
시작에 앞서 Firebase 기본 설정은 맞추셔야 합니다.
1. Firebase 로그인 제공업체 추가

Authentication -> 로그인 방법 -> 새 제공업체 추가 -> Google 선택

중요 메시지를 확인하고 사용 설정을 선택하시고 저장을 눌러주세요.
2. SHA 인증서 지문 추가
1번 과정에서 *중요* 작업을 해야 합니다.

Firebase -> 프로젝트 설정 -> 내 앱 -> Android -> 디지털 지문 추가
https://developers.google.com/android/guides/client-auth
클라이언트 인증 | Google Play services | Google for Developers
이 페이지는 Cloud Translation API를 통해 번역되었습니다. 클라이언트 인증 컬렉션을 사용해 정리하기 내 환경설정을 기준으로 콘텐츠를 저장하고 분류하세요. 특정 Google Play 서비스 (예: Google 로그
developers.google.com
디지털 지문을 찾는 방법은 위 사이트에 설명되어 있습니다.
SHA-1, SHA-256 둘 다 추가해 주시면 됩니다.
3. IOS Client Id 추가

Firebase -> 프로젝트 설정 -> 내 앱 -> iOS -> GoogleService-Info.plist 파일을 다운로드하여 줍니다.

해당 파일을 열어서 CLIENT_ID를 복사하고 프로젝트 root폴더 -> ios -> Runner -> Info.plist에 아래처럼 추가해 줍니다.
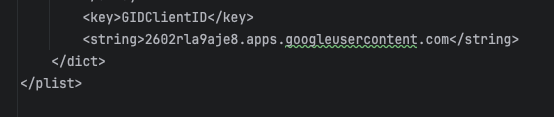
<key>GIDClientID</key>
<string>2602rla9aje8.apps.googleusercontent.com</string>
4. IOS URL Schemes 추가
이번에는 GoogleService-Info.plist 해당 파일에서 REVERSED_CLIENT_ID를 복사하고 3번과 똑같이 Info.plist에 추가해 줍니다.
<key>CFBundleURLTypes</key>
<array>
    <dict>
        <key>CFBundleTypeRole</key>
        <string>Editor</string>
        <key>CFBundleURLSchemes</key>
        <array>
            <string>[Your REVERSED_CLIENT_ID]</string>
        </array>
    </dict>
</array>
전부 복사해서 REVERSED_CLIENT_ID만 붙여 넣어주세요.
5. 구현
https://jutole.tistory.com/160
[Flutter] Google Login 구현
https://jutole.tistory.com/159 로그인 방법 -> 새 제공업체 추가 -> Google 선택 중요 메시지를 확인하고 사용 설정을 선택" data-og-host="jutole.tistory.com" data-og-source-url="https://jutole.tistory.com/159" data-og-url="
jutole.tistory.com
'Flutter > SNS Login' 카테고리의 다른 글
| [Flutter] Google Login 구현 (1) | 2024.10.10 |
|---|---|
| [Flutter] Apple Login 심화 구현 - Ios App (0) | 2024.09.30 |
| [Flutter] Apple Login 구현 - Ios App (0) | 2024.09.30 |
| [Flutter] Apple Login 설정 - Ios App (4) | 2024.09.27 |